 |
| I really enjoyed seeing this on my design wall! |

Sunday, May 31, 2015
May Bee Sewcial block
Friday, May 29, 2015
Fun HST quilt for a recent grad

I made this quilt as a gift to the daughter of some of our closest friends. She just graduated high school so I sized this to fit on a twin xl dorm bed, if she likes it enough to want it for her bed.

I took a layer cake I was given at Christmas (thanks Mom and Dad!) plus some extras from my stash and made a bunch of HST. I added a few random solids instead of the green for a few of them to liven it up. I'm glad I went with that itty bitty printed green instead of a solid because it adds a nice texture.

It was quilted in a baptist fan design by Susan Santistevan. She did a great job and it works well with the kind of funky vintage mod vibe of the fabrics.
Stats:
Fabric: most of a layer cake of Felicity by Robert Kaufman, random stuff from my stash and the green is Patrick Lose Mixmasters Dot-to-Dot.
Quilted by: Susan Santistevan
Size: 63'' x 90''
Thursday, May 7, 2015
Pinwheel Pincushion Giveaway!

It is Giveaway Day at Sew Mama Sew!

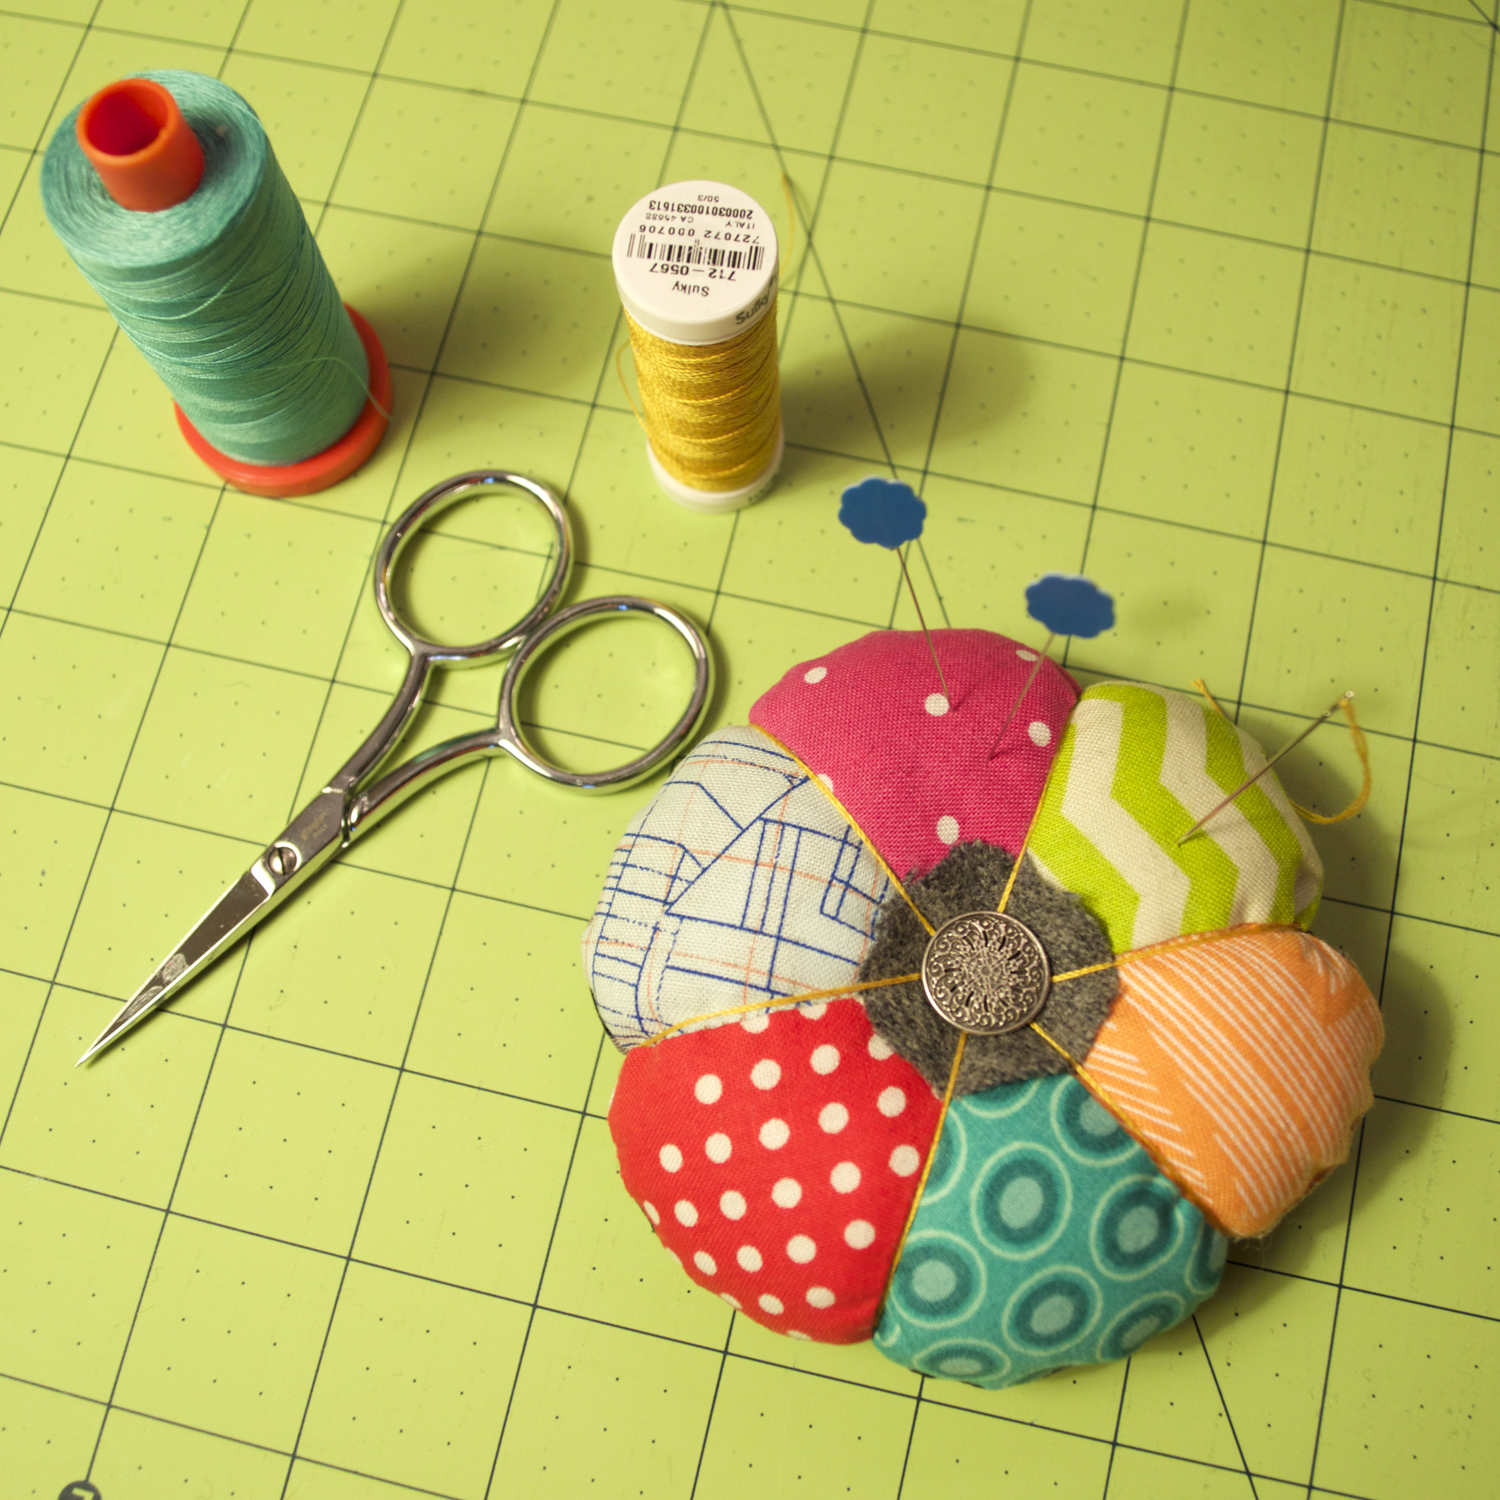
I want to giveaway the adorable Pinwheel Pincushion I just made!
If you don't win, I just posted a tutorial so you can make your own. If I could make one for everyone I would, but this is the next best thing.
Update: Giveaway winner is #39! Giveaway is now closed!
Pinwheel Pincushion Tutorial & Beginning Paper Foundation Piecing

I just made this cute pincushion and thought I would share how I made it. Paper piecing can seem a bit intimidating if you've never tried it but this one is an easy one to do. I've explained it step by step for beginners.
Materials:
- Printout of Pinwheel Pincushion foundations templates
- 6 scraps of fabric for the petals, each approximately 3'' x 5''
- 5'' square of fabric for backing
- 1'' or so scrap of wool felt, cut into a circle
- 1 shanked button
- Thick thread for gathering: 12 wt or perle cotton thread, or double strand of floss
- Long needle
- fiberfill
- crushed walnuts (optional)
Instructions:
1. Roughly cut out the foundation templates, 1/8'' or more from the outside black line.2. Place two petal fabrics on the non-printed side of Template 1, right sides together, so that both will cover their entire wedges and past the seam allowance when sewn and pressed open. In my example, the printed side of the template is up, then the wrong side of the orange fabric, and then the right side of the green fabric. The orange fabric will be my center wedge and my green fabric will be my left wedge. The fabrics need to overlap at least 1/4'' past the sewing line for their seam allowance. In my example, this is the seam sewing line on the right side of the center wedge. It doesn't matter which wedges you start with. (Note: the foundation is a mirror image of the finished wedge placement.) I'm kinda

3. Shorten stitch length to 1.5mm. Sew on the foundation line, going a stitch or two beyond the outer line/seam allowance.

4. Check that your wedges cover the entire wedge plus seam allowance. If ok, fold back paper on seam.

5. Line up ruler along paper fold at the 1/4'' mark. Trim excess fabric leaving a 1/4'' seam allowance. (Don't cut on the stitch line or paper!)

6. Flatten out foundation paper and press wedges open.
 |
| This is what the right side will look like at this point. |
 |
| This is what the back/foundation side will look like at this point. |

8. Repeat steps 2–7 for Template 2 to create other half of the pincushion top. Trim both halves on outside line. Do not remove papers yet!

9. Put both template halves right sides together. Poke a pin through the center tip of each half to line them up. Sew them together along the straight center line.

10. Remove the foundation papers. (Here is where the reason you reduced stitch length becomes apparent: it is much easier to tear the papers out!) Press.

 |
| The finished pincushion top |
11. Here's my cheater shortcut. Instead of cutting out a template for the bottom circle, place the bottom square and pincushion top right sides together with the top on top.

12. Starting a couple stitches before one of the wedge seams, stitch all around the top with a 1/4'' seam allowance, leaving a gap by stopping your stitching a couple stitches past the opposite seam on the wedge you started with. Backstitch at the start and end. (Stitching just over those seam lines will reinforce the pieced top.) Trim excess bottom fabric.

13. Turn right sides out and fill about half with crushed walnuts and half with fiber fill. You can certainly skip the crushed walnuts but it gives the pincushion some nice weight. Stitch the opening closed by hand.

14. Thread a needle (I used a doubled-up strand of 12 wt thread) with about a 30''+ tail. Make a knot at the end. Poke the needle through the top of the pincushion where the pinwheel wedges meet in the center. (The button and felt circle will cover the knot.)

15. Bring the needle all the way from the top to the center of the bottom and pull thread tight.

16. Bring thread back up around to the top. Thread the needle through the button and the center of the felt circle. Sew through the center of the top to the center of the back, lining up the thread with a wedge seam.

17. Sew through the pincushion for each wedge seam in this order: bring the thread around from the bottom along one of the wedge seams, sew through the button, sew through the center of the felt circle, sew through the center of the top to the center of the bottom and bringing it up around again on the opposite side. Keep thread taut to gather up the pincushion. Continue stitching until all of the wedge seams have been gathered.

18. When all the wedges are gathered, sew the last wedge through to the back as in step 17, but instead of bringing it back around along a wedge seam, move it a couple threads over and bring it back up through the center of the back to the center of the front. Knot off under the button on the top. Now you are done!
Tuesday, May 5, 2015
Cute and Scrappy Doll Quilt

My daughter has a birthday party to go to in a week. Her friend wanted some super expensive accessories for her American Girl doll. Instead, I made this little doll quilt that is perfectly sized for an 18'' doll. It's nothing but a 5 x 6 layout of 4'' squares, backed with a fat quarter, quilted with a swirly flower, raw edge appliquéd and bound with some crazy homemade bias binding from my great aunt. The birthday girl really likes purple, and also yellow and green. I raided my scrap bin and everything is from there or my stash.

Speaking of the bias binding, I'm really glad I used that for something like this because now I know how wonky she made it and won't likely use it again. I have a large amount of her handmade bias binding. Three sides look just fine but the bottom got weird. Lesson learned and now my daughter gets to use it for her art collages. I think I'll leave it even though part of me really wants to do it over. I stitched it down with 3 rows of stitching. And it's a doll quilt meant to be played with. The stitching on it looks cute.

I hope her friend will enjoy getting this as a birthday present! It is one of a kind, made just for her.
Subscribe to:
Posts
(
Atom
)