Showing posts with label freebie. Show all posts

Thursday, May 12, 2016

Synapse Quilt for the MQG


The new pattern I designed for the Modern Quilt Guild just launched today! I'm so excited because I love this quilt. It takes a classic, simple plus shape and makes it something special with the pops of bright pink, the scrappy fabrics and spacial relationships.

The pattern is called Synapse. It's named after the minute gaps between brain cells. This quilt has thin sashing between the plus blocks, creating an interesting visual tension. The dynamic pops of pink make your attention dart from block to block, like nerve impulses sending signals from one cell to another. The circular quilting defines each cell. The end result is one eye-catching and elegant quilt. That connection between this quilt and brain synapses was inescapable to me.


I love being part of the MQG and am so happy they chose my design to be part of this program. The free quilts they offer every month are amazing. The membership is worth it for so many reasons already, and getting these every month is just icing on the cake. I belong to the Denver Metro MQG chapter. They are a fun and incredibly talented bunch!


Christine Perrigo did the quilting on it. She said circles and we both immediately jumped to doing the rings around the blocks. She designed this and it is just perfect! It is amazing to have her insight and amazing quilting skills. I love this quilt all the more for her being a part of it!


Anyone who is a member of the MQG can get the pattern for free! Yay!!!!

Thursday, May 7, 2015

Pinwheel Pincushion Tutorial & Beginning Paper Foundation Piecing


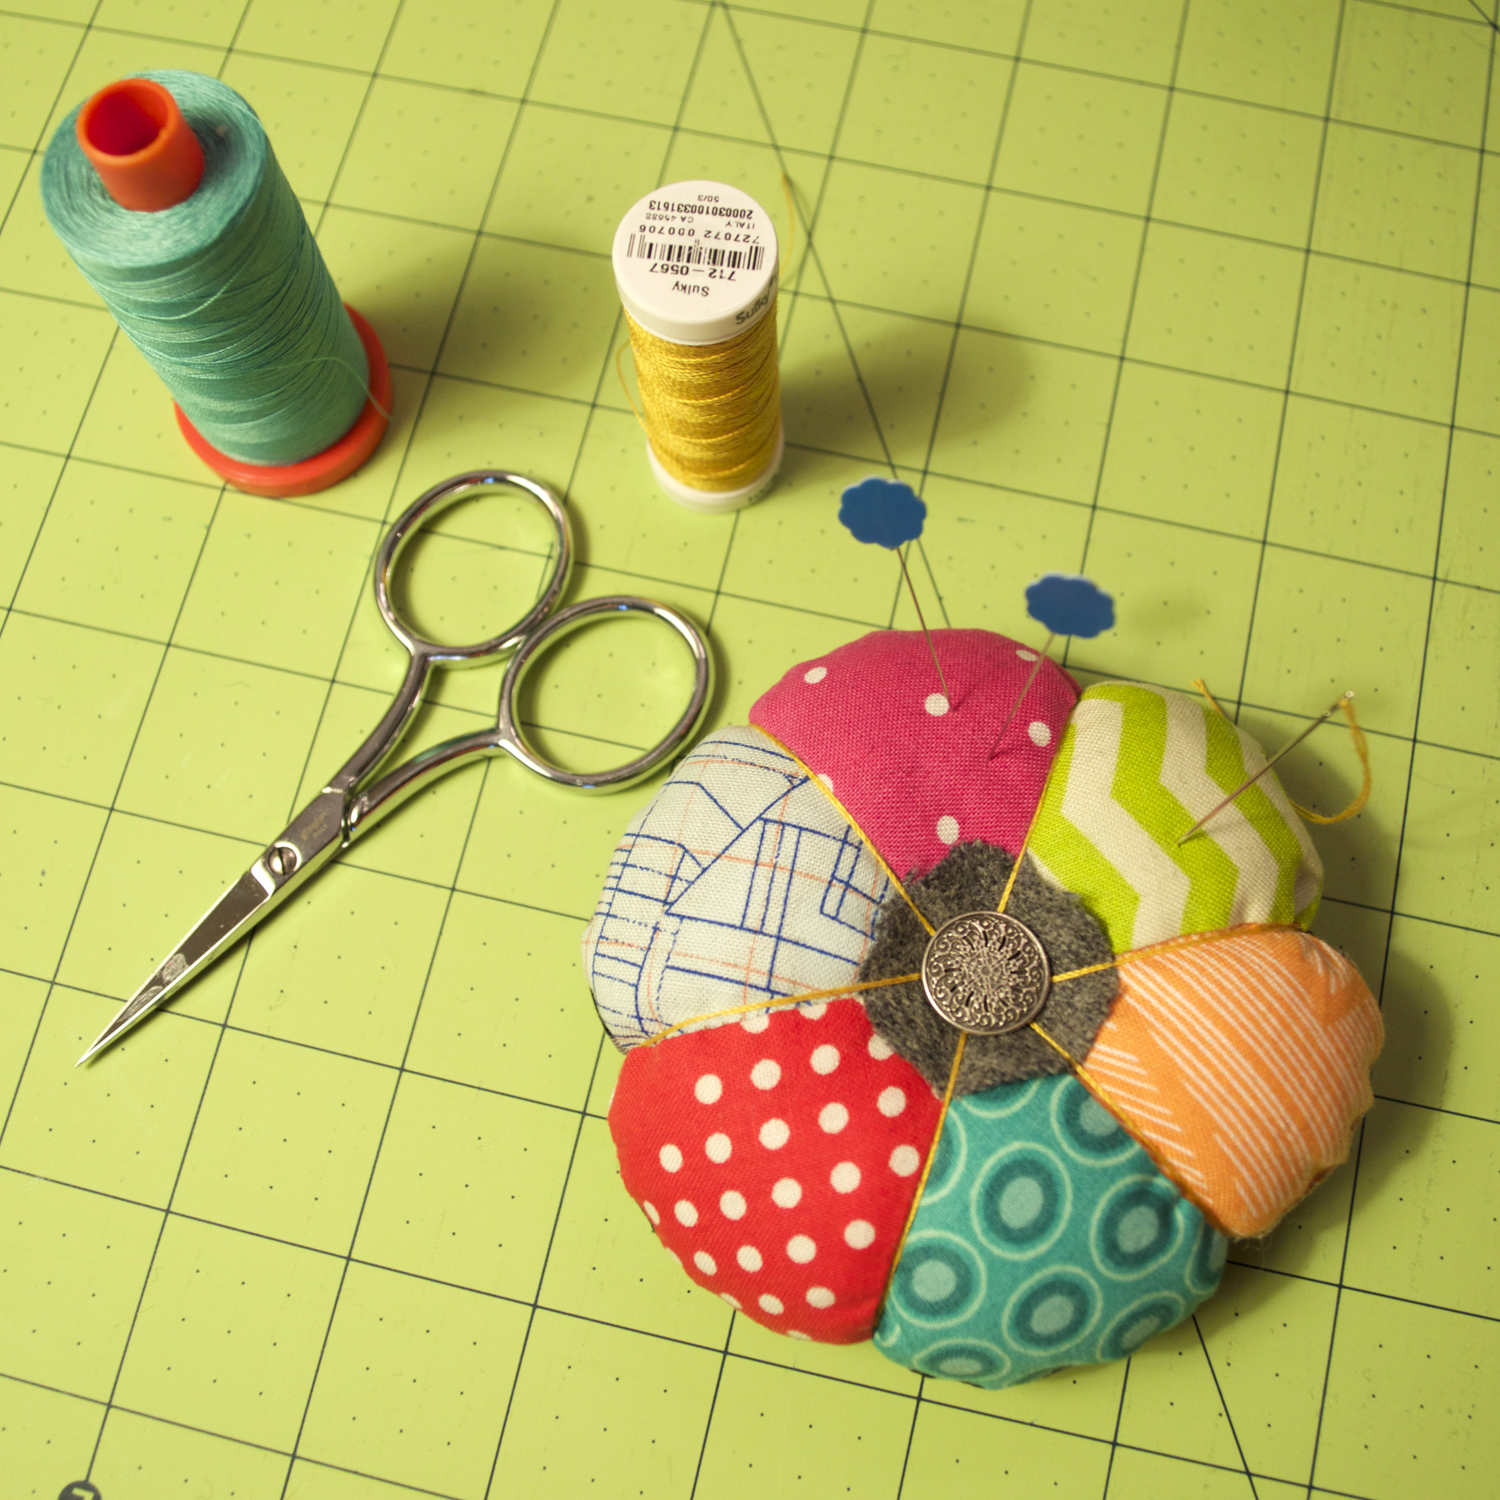
I just made this cute pincushion and thought I would share how I made it. Paper piecing can seem a bit intimidating if you've never tried it but this one is an easy one to do. I've explained it step by step for beginners.

Materials:


  • Printout of Pinwheel Pincushion foundations templates
  • 6 scraps of fabric for the petals, each approximately 3'' x 5''
  • 5'' square of fabric for backing
  • 1'' or so scrap of wool felt, cut into a circle
  • 1 shanked button
  • Thick thread for gathering: 12 wt or perle cotton thread, or double strand of floss
  • Long needle
  • fiberfill
  • crushed walnuts (optional)

Instructions:

1. Roughly cut out the foundation templates, 1/8'' or more from the outside black line.

2. Place two petal fabrics on the non-printed side of Template 1, right sides together, so that both will cover their entire wedges and past the seam allowance when sewn and pressed open. In my example, the printed side of the template is up, then the wrong side of the orange fabric, and then the right side of the green fabric. The orange fabric will be my center wedge and my green fabric will be my left wedge. The fabrics need to overlap at least 1/4'' past the sewing line for their seam allowance. In my example, this is the seam sewing line on the right side of the center wedge. It doesn't matter which wedges you start with. (Note: the foundation is a mirror image of the finished wedge placement.) I'm kinda lazy efficient and don't pin these but if it make you feel more comfortable, you can pin the pieces to the foundation to keep them in place while you sew.

3. Shorten stitch length to 1.5mm. Sew on the foundation line, going a stitch or two beyond the outer line/seam allowance.

4. Check that your wedges cover the entire wedge plus seam allowance. If ok, fold back paper on seam.

5. Line up ruler along paper fold at the 1/4'' mark. Trim excess fabric leaving a 1/4'' seam allowance. (Don't cut on the stitch line or paper!)

6. Flatten out foundation paper and press wedges open.
This is what the right side will look like at this point.
This is what the back/foundation side will look like at this point.
7. Repeat steps 2–6 to add third wedge. Once wedges are pressed, stitch 3-4 stay stitches in the seam allowance to tack down the outer corners of the wedge.

8. Repeat steps 2–7 for Template 2 to create other half of the pincushion top. Trim both halves on outside line. Do not remove papers yet!

9. Put both template halves right sides together. Poke a pin through the center tip of each half to line them up. Sew them together along the straight center line.

10. Remove the foundation papers. (Here is where the reason you reduced stitch length becomes apparent: it is much easier to tear the papers out!) Press.

The finished pincushion top
11. Here's my cheater shortcut. Instead of cutting out a template for the bottom circle, place the bottom square and pincushion top right sides together with the top on top.

12. Starting a couple stitches before one of the wedge seams, stitch all around the top with a 1/4'' seam allowance, leaving a gap by stopping your stitching a couple stitches past the opposite seam on the wedge you started with. Backstitch at the start and end. (Stitching just over those seam lines will reinforce the pieced top.) Trim excess bottom fabric.

13. Turn right sides out and fill about half with crushed walnuts and half with fiber fill. You can certainly skip the crushed walnuts but it gives the pincushion some nice weight. Stitch the opening closed by hand. 

14. Thread a needle (I used a doubled-up strand of 12 wt thread) with about a 30''+ tail. Make a knot at the end. Poke the needle through the top of the pincushion where the pinwheel wedges meet in the center. (The button and felt circle will cover the knot.)

15. Bring the needle all the way from the top to the center of the bottom and pull thread tight.

16. Bring thread back up around to the top. Thread the needle through the button and the center of the felt circle. Sew through the center of the top to the center of the back, lining up the thread with a wedge seam.

17. Sew through the pincushion for each wedge seam in this order: bring the thread around from the bottom along one of the wedge seams, sew through the button, sew through the center of the felt circle, sew through the center of the top to the center of the bottom and bringing it up around again on the opposite side. Keep thread taut to gather up the pincushion. Continue stitching until all of the wedge seams have been gathered. 

18. When all the wedges are gathered, sew the last wedge through to the back as in step 17, but instead of bringing it back around along a wedge seam, move it a couple threads over and bring it back up through the center of the back to the center of the front. Knot off under the button on the top. Now you are done!


Monday, June 23, 2014

Essential Guide to Modern Quiltmaking Blog Tour


I am excited to introduce Lucky Spool’s Essential Guide to Modern Quilt Making and tell you a little bit about my chapter.

The coolest thing about this book is that it is not just a project book, although there are killer projects included. It is an education in modern quilting techniques. This book is deep in content. Each contributor has shared their expertise on a subject, like alternate grid work, working with solids or prints, quilting, improv piecing and more. To top it off, there is all the eye candy in the large gallery of modern quilts.

The sheer amount of information and inspiration makes this an essential reference book for any quilter, especially those who enjoy modern quilting or are curious about trying it.


I am thrilled to contribute Chapter 1: Principles of Color. Most of all, I hope the chapter will help you gain confidence in choosing a color scheme, applying colors to your quilt designs and understand color in a way that opens doors to creative expression.

I walk you through my approach to color theory, which might be a bit different than what you have learned. I start out with defining the three most important principles of working with color, then go over how to utilize these principles to your advantage (which doesn’t have as much to do with the color wheel as you may have been taught). Speaking of the color wheel, I don’t even recommend using the traditional red/yellow/blue color wheel. I’ve included a useful troubleshooting guide at the end of my chapter to help you with specific color issues that many quilters experience.

Color Play Quilt Project 


I’ve designed this quilt project to help even a beginning quilter experiment with color principles. I love this quilt for its striking design and simplicity, which creates an ideal framework for changing up the colors. Your color choices will completely alter the mood of the quilt.

Blog tour bonus! 

Here are some examples of other directions you could take the color, to get your wheels turning, along with a free Color Play coloring sheet to download, print and color in.


Special discount

Get the book at 20% off at the Taunton store with the coupon code EGQM20. The discount is good for your entire purchase through July 27.

Visit the other authors, too! 

Check out this amazing list of who is in the book and their chapters. Here is the blog tour schedule:

6/23  //  Chapter 1: Principles of Color  //  Teacher: Kari Vojtechovsky (you are here!)

6/24  //  Chapter 2: Working with Solids  //  Teacher: Alissa Haight Carlton (Handmade by Alissa)

6/25  //  Chapter 3: Working with Prints  //  Teacher: Dan Rouse (Piece and Press)

6/26  //  Chapter 4: Improvisational Patchwork  //  Teacher: Denyse Schmidt (dsquilts.com)

6/27  //  Chapter 5: The Alternate Grid  //  Teacher: Jacquie Gering (Tallgrass Prairie Studio)

6/30  //  Chapter 6: Circles and Curves  //  Teacher: Cheryl Arkison (Dining Room Empire)

7/01  //  Chapter 7: Paper Piecing  //  Teacher: Penny Layman (Sew Take a Hike)

7/02  //  Chapter 8: Large-Scale Piecing  //  Teacher: Heather Jones (Olive and Ollie)

7/03  //  Chapter 9: Modern Machine Quilting  //  Teacher: Angela Walters (Quilting is My Therapy

7/04  //  Chapter 10: A Study of Modern Quilts  //  Teacher: Heather Grant (Modern Day Quilts)

Thursday, June 19, 2014

Lucky Spools


I made this little mini quilt for Susanne Woods, founder of Lucky Spool (hence the monogram letters and spools) and someone who really deserves a big thank you from me. That is putting it lightly. The quilt is a tiny little thing. I didn't measure it but I think it was around 10 or 12'' square.

Speaking of Lucky Spool Media, keep an eye on all the great books coming out from them. I'm biased because I contributed to one of them, but seriously, there are amazing titles that will be rolling out. Really amazing.

I got the idea for this quilt when I saw some First of Infinity block letters fabric my wheels started turning about how to do some kind of monogram and knew I wanted to put spools with it.

The blocks of the small letters in the fabric finish to 2'' so I needed a 2'' spool. I made my own paper piecing pattern for it and thought I'd share. They are easy to put together, considering it is a 2'' block made of 12 pieces.

Friday, May 16, 2014

Quilter's Cheat Sheet Freebie

Like all quilters, I always find myself calculating some of the same measurements over and over, which is hardest while actually at a quilt shop. I finally created a little cheat sheet for myself. I'll be giving them to my quilt guild tomorrow. I wanted to share it with you too!


  • There are yardage calculations for straight grain, double fold binding (which is how I do binding 95% of the time) for a few different binding widths. It even says how many strips you need to cut.
  • There is a quilt size and backing chart which shows the minimum sizes and backing yardage needed. 
  • It's got a yards to inches conversion because no matter how many times I think about those numbers, I always seem to draw a blank when I get to a cut counter.
  • Finally, on the back, there are some calculation guides for creating squares, half square triangle blocks and quarter square triangle blocks.
  • All of that, and it folds up to the size of a business card.
I hope you find this useful! Click on the image below to get the pdf, open that file and print (no scaling), cut out on the black lines, then fold long sides together and then fold short sides together, and voila—you've got yourself a handy, dandy little cheat sheet wherever you go.


PS: I hope to show you more about that Quilts for the Making logo soon!